Friday, February 28, 2014

What I'm Drinking

Lately, I've been craving a good Moscow Mule. It's not a drink I regularly make at home, though I'm not really sure why. It's incredibly easy, and it only takes a few ingredients.


Moscow Mules are deliciously refreshing. If you've never tried one, then I highly recommend you do in the very near future.

Here's what you'll need:

Voda
Ginger Beer
Lime


To make your drink, simply fill a glass with ice (any glass will do, though they are traditionally served in copper mugs like this one). Add 2 ounces of vodka, the juice from half the lime, and top it off with ginger beer. Add a slice of lime to garnish, and you're done!

Some people add mint as well; do so if you wish. Just be sure that you use a good quality ginger beer (not to be confused with the ginger ale I talked about in my last post - they are very different).


Couldn't be easier, right?

Hope you all enjoy your weekend! See you next week!

Five on Friday


1. I could really use some more of this type of therapy in my life!

2. I've been keeping a steady supply of Reed's Ginger Ale on hand. I tend to get nauseated fairly often, and this stuff is a lifesaver! They apparently also have a drink specifically for treating nausea, but I've yet to find it anywhere locally. Has anyone tried it?


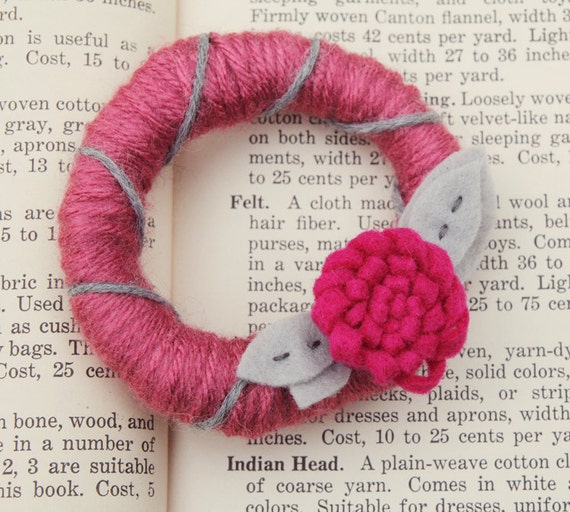
3. This shop makes some of the cutest handmade mini wreath ornaments I have ever seen.


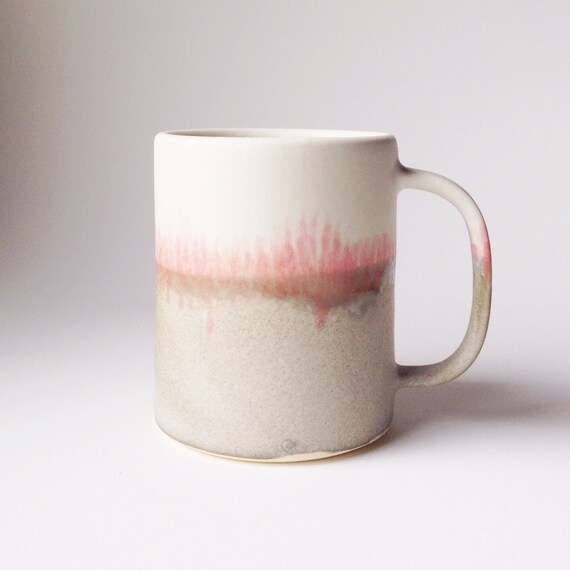
4. I am in love with this beautiful mug!

5. Do you decant your wine? Here's why you really should.

Have a lovely weekend, all! Don't forget to check back later for my weekly What I'm Drinking post!

Wednesday, February 26, 2014

Project Life: My Process, Part 2

In yesterday's Part 1 post, I discussed how I journal about my week, as well as how I take, edit, store, and print photos. Today I'm getting to the fun parts of putting together a Project Life spread. I'll be covering how I go from a folder of random bits to a polished & complete week in my album.

**Be warned! This post is going to be long and picture heavy! But I wanted to be thorough and to give you all the information, details, and tips I could squeeze in. I hope you don't mind! :)

So when we left off yesterday, I had my OhLife printout, my ephemera, and my photos all tucked away in a folder labeled with the week's number and dates. To start putting together my layout, I grab that folder and head to my workspace.

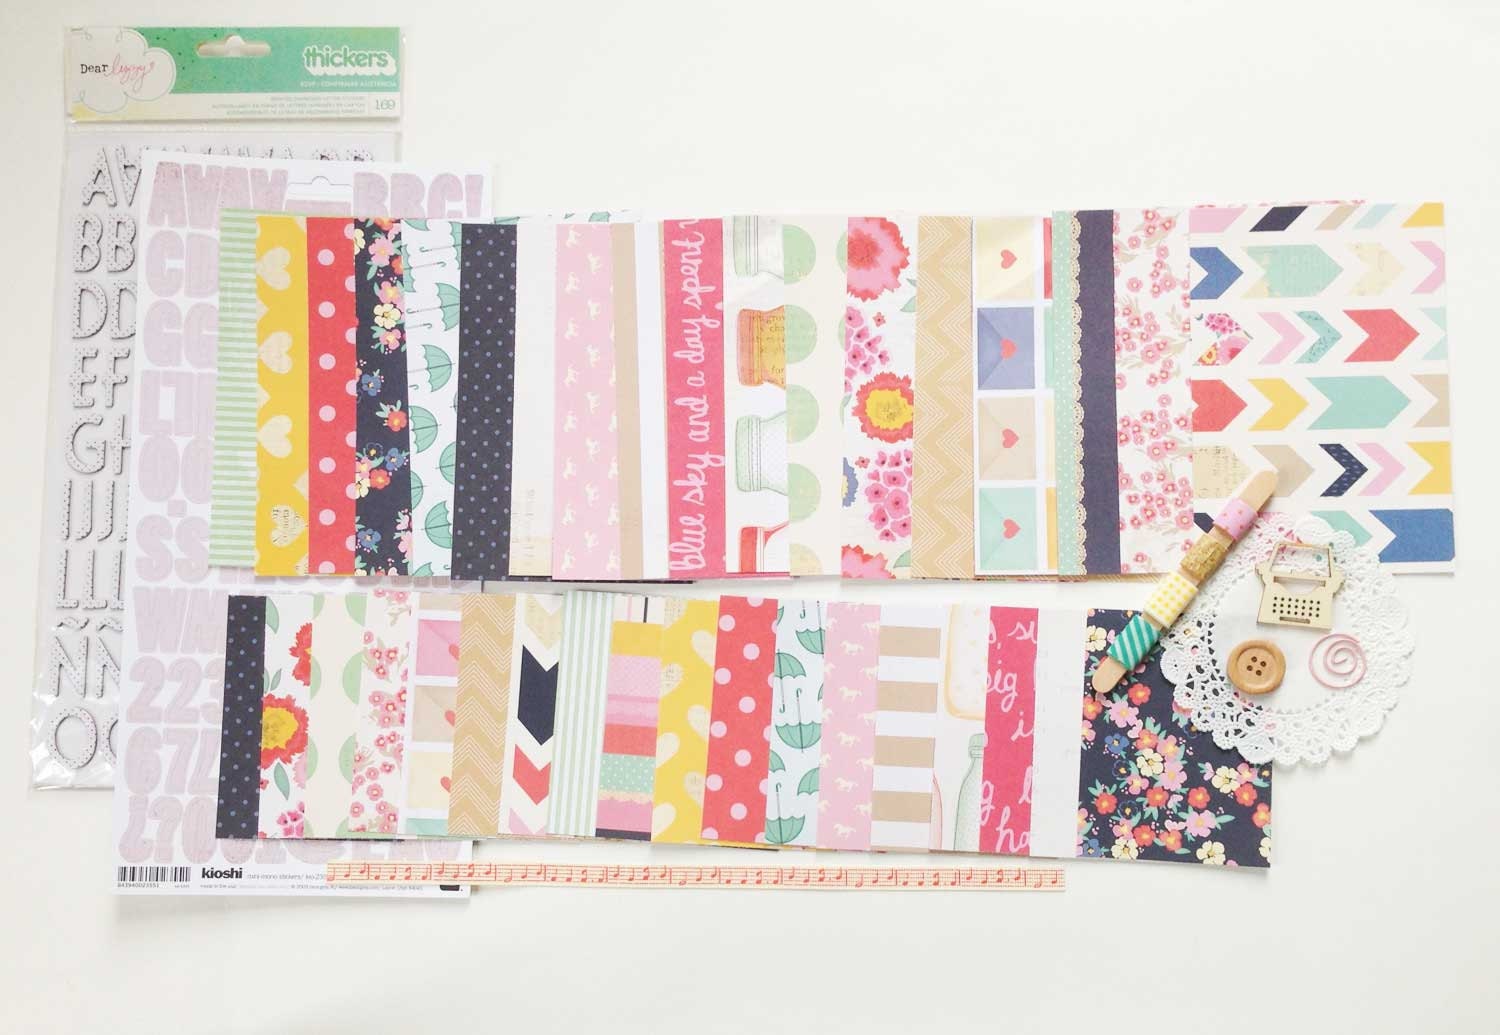
The first thing I do is choose the papers I plan to use and the color scheme for the week. I like to work with kits or single collections as my starting point. I find that if I'm left to choose papers from my entire stash, I quickly become overwhelmed, and I end up spending all of my time sorting through papers instead getting my layout finished. For this week, I chose the Dear Lizzy Lucky Charm mini kit from the Kinship Genealogy Etsy shop that, for some reason, I hadn't used in my Project Life yet - major oversight, since it's one of my absolute favorites!


Gorgeous, right? I love this collection! So like I said before, I use the kits as my starting point, then add in a few extras that I think go well with the color scheme or theme. For this kit, I began by adding a few other bits from the Lucky Charm collection that I had in my stash...an obvious choice.


From there I grabbed the Albums Made Easy, Simply Happy 4x6 and 3x4 journal card sets from We R Memory Keepers. I had already used these in my spread for week 1, but there were plenty sheets left in each pad, and the colors coordinate beautifully with the Lucky Charm collection.


See how well they go together?! So perfect. Next I grabbed a couple (partial) sheets of the Love You More collection from Elle's Studio. I knew the colors would work well, and I was inspired by this spread by Adrienne Alvis to use the Doily Love sheet for my title card.


Finally I grabbed a few more pieces from previous Dear Lizzy collections that I though might work well. The colors from all of her collections are fairly similar, and while they may not all work together, there are bits from each that certainly do.


With my papers (and a few embellishments) chosen, it was time to start working with my layout. I grabbed two page protectors from my binder and laid them out on my workspace.


For this week, I chose two Becky Higgins Design A page protectors. These are my go-to choice, though I do have several others in my binder that I sometimes play around with. Usually I just look at the orientation of the photos I have for the week and only deviate from the Design A pages if my photos require it.


With my pages laid out, the first thing I do is start placing my photos where I think I might want them. I pay attention to size and color to try to create balance on my page. I also try to keep things somewhat chronological, but I'm totally okay with mixing up the order if it makes for a more aesthetically pleasing layout.


With my photos in place, I add in my ephemera. This week there were just two little bits to add. Some weeks I have to do some serious editing due to lack of space. I'm kind of a hoarder when it come to this stuff, so I often have more than I can deal with. Then I have to remind myself that it's not necessary to capture absolutely every detail of our week and that an overview will suffice (#thecrazyinmyhead).


With everything laid out roughly where I think it will go, I start adding paper and filler cards. Back at the beginning of this process when I'm picking out papers, there are usually several that I know I'll want to use in certain spots (like the Doily Love paper as my title card). I start with those.


Then I gradually add other papers that will work with the journaling I have planned and the color balance of the page. I try to make sure that the colors I use appear on both sides of my spread. For example, the yellow ombre paper I chose to use in the top right pocket, meant I needed some yellow on the left side. To make that work, I moved the iPhone screenshot of the weather to the left and added the yellow filler card in its place. This also worked to balance out the chalkboard background I used between the two ephemera pockets. The teal card on the bottom right balances the title card, the kraft card on the bottom right balances the Starbucks sleeves, so on and so forth.


Once I have background papers and filler cards for all of the pockets, I start adding some of the embellishments I think I might want to use. This is the point where I sometimes have to go back to my stash to find the perfect piece for a particular spot. I lay everything loosely where I think it might work before I adhere anything.


Once I'm satisfied with most of the pockets, I slide the whole thing off to the side and begin pulling individual cards in front of me to glue everything down and add the embellishments. There's usually a lot of fussing and fidgeting with each card as I attempt to get it just the way I want it.


For this spread, I planned to do quite a bit of journaling, and since I had a lot of information that I wanted to include, I knew my best option was to type it rather than hand-write everything. This would have been the perfect time to use that typewriter I've been searching for...but alas, I have not yet found my love...so my printer had to do.


With the typing and most of the embellishing done, I had an almost-completed layout. All that was left was to stitch things down using my sewing machine and to add some hand-written bits and stamps. And here's the finished spread!


I added a few stamped arrows and chevrons to fill in some blank spaces, and made liberal use of my date stamps. I also added my handwriting on the "breakfast of champions" card and some doodling on the "his & hers" card (I was going for a chalkboard effect).


I hope you enjoyed learning more about my process, and I hope it inspired you in some small way. Please let me know if you have any questions about any part of what I've written, and I'll do my best to provide answers here on the blog.


I'd also love to hear about your process, so please post links in the comments if you've written about how you complete a Project Life spread. There is always more to learn, & I find everyone's processes fascinating!


Thanks for stopping by!

Products Used:

Dear Lizzy Lucky Charm Document Life Mini Kit from Kinship Genealogy

Dear Lizzy Lucky Charm Lucky Coin 12x12 Paper

Dear Lizzy Lucky Charm This & That 12x12 Paper

Albums Made Easy Simply Happy 4x6 and 3x4 journal card sets from We R Memory Keepers

Elle's Studio Love you More Doily Love 12x12 Paper

Becky Higgins Project Life Design A Page Protectors

Glitz Design Color Me Happy 8x8 Paper Pad (no longer available)

Studio Calico Sundrifter Goodness Aqua Ombre Thickers 

Amy Tangerine Goodness White Thickers (no longer available)

Amy Tangerine Yes, Please White Wish Foam Thickers

Hero Arts/Studio Calico Sundrifter Frame & Feathers Stamp Set (no longer available)

Project Life Date Stamp

Studio Calico Classic Calico 3 Roller Date Stamp

Uni Ball Signo White Gel Pen

Black Journaling Pen


Tuesday, February 25, 2014

Project Life: My Process, Part 1

Today I'm sharing the first part of my process for completing a Project Life spread. This is a post I have been meaning to write for a long time. I had hoped to be able to share a video as well, but my current set-up has made that difficult, so until things change, this post will have to do. :) Part 1 will cover what I consider to be the very boring but very necessary parts of prepping my Project Life spreads: journaling, photo editing, and filing. Tomorrow's Part 2 post will cover the more fun bits, so be sure to check back!

My process is basically the same whether I'm doing a recent week or a catch-up week. I have a fairly streamlined system that works for me regardless of the time period I'm capturing, though I'm rarely up to date, so I am most often catching up. The week I'll be sharing today & tomorrow happens to be week 2 of this year.


I start every layout by first consulting my OhLife files. As far as I'm concerned, OhLife is the biggest and best kept secret for a well-organized and well-documented Project Life Album. I can't believe more people don't use this service!

Basically, OhLife is just a way of journaling your day. After you sign up, you'll receive an email once a day reminding you to journal about what happened. All you have to do is reply to the email and OhLife automatically adds the entry to your online journal. It's completely secure, so there are no worries about privacy, and you can easily download your entries to print or simply access them in your online journal. I prefer to download and print my entries for each week, and I usually do this several weeks at a time (because I am rarely fully caught up with my album).


Once I have my journaling for the week, I make note of the photos I have for each day. I use my iPhone 5 almost exclusively for taking photos during the week. From there, my images are automatically downloaded to iPhoto on my computer via iCloud. This is a HUGE timesaver. It used to take me much longer to sort and upload my photos. I'm also able to import any photos that J may have takes through our shared photostream. I love that I'm able to very easily add his perspective on our week this way!

As you can see above, all the images are organized by month in my iPhoto events folders, so I only have to click on the appropriate folder, scroll to the dates I'm documenting, pick which photos I'd like to use, and make note of them on my OhLife printout. I write down the file name as well as a short description, that way if when I'm interrupted, I can easily pick up where I left off without backtracking.

I almost always edit my photos before printing them. Because I use my phone 99.99% of the time and because I am certainly no photographer, I rely on several photo editing programs to help make them presentable:


  • Pictapgo is an iOS app by Totally Rad. This is definitely my favorite way of editing my photos. There are tons of filters, but mostly I just use it as an easy way to lighten dark iPhone images. I highly recommend this app if you're an iPhone user.

  • When I want to do more work with my photos, I use Photoshop. I have CS5 on my computer, and while I am certainly no Photoshop expert, I'm capable enough to do some basic editing. I have several actions installed, but the ones offered by The Pioneer Woman are by far my most-used.
  • I recently discovered the PicFrame app and have fallen in love with how easy it is. I've always wanted my photos to have a white border, but was put off by the extra work it requires. Thankfully, this app makes it super easy! It's also an easy way to make photo collages, which is perfect for getting more photos into a spread without adding inserts.

Once I have all of my photos edited, it's time to get them printed. I used to print a lot of my photos at home, but my printer isn't a designated photo printer, and the quality was starting to bother me. So lately I've been sending my photos out to various printers. I have printed with Shutterfly, Snapfish, Walmart, Walgreens, Meijer, and CVS, and other than a small fiasco with my most recently printed order from Walgreens, they all seem to be pretty equal to me - not the best in quality, but better than I can do at home. I'd love to be able to print all of my photos with Persnickety Prints, but it's just not within my budge. So when it's time to print, I usually go with wherever there's a sale.

So that pretty much covers my journaling and photo storage, editing, and printing methods. There's one more thing I wanted to mention before I leave you for today, and that's how I deal with all of the little bits and pieces of ephemera that I include in my spreads.

For each week of the year, I make a file. I use regular ol' office supply store files and label them with the week number and the dates it includes. I usually do this months in advance. Then, as the weeks go by, I fill them with al the little pieces of our lives: receipts, coffee sleeves, food labels, name tags, etc. When I create the OhLife printouts, these go in the file too. And when I print multiple weeks worth of photos, I date each one and put them in their respective file folders as well. That way when I'm ready to complete a Project Life spread, I only need to grab my file for that week and I have everything I need.

As I said before, I'm rarely up to date with my album, and I am often doing all of the above steps in batches. To keep track of what's been done for each week, I keep a binder with a checklist. As I print the OhLife file or edit the photos for that week, I check each task off on my checklist. 

Without these systems, I would never know what still needed to be done, know where my ephemera or photos for that week were, or remember many of the stories I wanted to record. I've actually started making these folders for previous years as well in the hope that at some point, when I have the time, I can go back and easily put together Project Life albums for most of our years together. 

Wow, that is one wordy post! Be sure to check back tomorrow when I'll be sharing the more fun parts of putting together my Project Life spread! :)

**ETA: The Part 2 post is now live! You can find it here.**


Friday, February 21, 2014

What I'm Drinking: Caramel Macchiato Martini

The other morning I was cleaning out a cupboard and found a nearly-empty bottle of Kahlua stashed in the back (yes, I find alcohol in random places in my house; don't judge). All of a sudden a brilliant thought occurred to me: I should invent the caramel macchiato martini! The ingredients were at once clear to me, although I knew the ratios would take a bit of tweaking. I put the bottle and other non-perishable ingredients on the counter and waited for a more appropriate time to begin experimenting (like after lunch).

After a bit of experimentation, I eventually discovered the perfect blend, and oh, boy! This one is a keeper! All I kept thinking was "how have I not thought of this before?!" It is dangerously delicious. Like Lays chips betcha-can't-drink-just-one delicious. And I was incredibly proud of myself.


Only later did I get around to checking for existing recipes, and found that (of course) there are plenty. So I can't claim to be the inventor of this concoction, but I can claim this particular recipe as my own.

The key to my recipe is the vanilla. Others called for caramel vodka and regular cream, but the little known secret to a Starbucks-style caramel macchiato is the vanilla syrup (it's basically a vanilla latte with caramel sauce). My version gets a double-dose of vanilla with both vanilla vodka and vanilla soy. Trust me, you get plenty caramel flavor with the caramel sauce alone.


So here's what you'll need:

  • Kahlua (or some other coffee liquor, this one would be appropriate)
  • Vanilla Vodka
  • Milk or Cream (I use Vanilla Silk)
  • Caramel Syrup
Start by filling a cocktail shaker half-way with ice. Add 1 1/2 oz of Kahlua, 1 1/2 oz of vanilla vodka, and 3 oz of milk, and shake what your momma gave ya.


Next, drizzle the inside of a martini glass with the caramel syrup. Working quickly, before the caramel all slides to the bottom of the glass, strain the liquid from the shaker into the glass. Sip & enjoy!

Unlike some martinis, this one is delightfully drinkable - not too strong or overpowering. It goes down easy just like its namesake.


Well, that's it for me this week. Hope you all have a lovely weekend!

Five on Friday


1. Yesterday was Love Your Pet Day. I suggest you follow the above advice and hug 'em if you got 'em.

2. This post by Vicki of Joyful Whimsy cracked me up. I feel the same way!


3.  This kitchen has been making me rethink my all-white-walls decision in the kitchen. At the very least, there may be some jadeite purchases in my future. (via Lisa Truesdell)

4. I've been trolling the internets recently in search of the perfect typewriter. I almost had one a couple weeks ago, but I got sick & missed the final bidding. My favorite place to search? Goodwill - yep, you can shop goodwill online right here.


5. I think I might be addicted to Belly Flops. A local store has had the small bags for $1.00 a piece, and I've been nearly buying them out. It's a problem.

Don't forget! I'll be back at 5:00pm today with a delicious cocktail to help get you through the weekend.

Happy weekend, all!

Thursday, February 20, 2014

Project Life 2013 Week 17

Just moving down the list, checking off week by week... Here's week 17 of 2013:


Spring was just starting to show its colors. I was finished with Little Shop. And life was back to normal.


All-in-all it was a pretty uneventful week. Most of my pictures capture the everyday, mundane details of our lives. Actually, I think I love these weeks the best. They're a real, honest picture of our lives. 


I added a bit of hidden journaling on the second page. It details what happened each day of the week, like how we were still dealing with insurance over the flooding in our basement, and how we saw the fox family that lives in our back yard for the first time that year.

Products Used: 

Color Me Happy 8x8 Paper Pad by Glitz

Amy Tangerine Yes, Please Wish Thickers in Black

My Mind's Eye Collectable Washi Tape (no longer available)

Red Woodgrain Washi Tape by Freckled Fawn

Tuesday, February 18, 2014

Project Life 2013 Week 16

For today's Project Life Tuesday post, I've decided to share another week from last year. I still haven't completed the move into my new craft room, and I still haven't found my mojo for this year's album. It looks like there may be a "my process for catching up with Project Life" post in my future. :) 

I'm also still working on putting together a gallery so that you can see all of my Project Life spreads in one place. I've been going back and forth between a couple different ideas, but I hope to have one of them up and running soon.

Now onto this week's spread.


Week 16 was an interesting week. We had torrential rains and one of our basement sump pumps broke, leading to a flooded basement. And it happened the night before we were scheduled to host the cast party for the final Saturday show of Little Shop of Horrors - ugh. 


Week 16 was also J's birthday week. We had a small celebration, just the two of us and some Outback. :) Also, the Kinship Genealogy Spring Kit became available in the shop that week (there are still a couple left - you can get one here).


That weekend was the last one for Little Shop. We had a party Friday night after the show, then our party Saturday night (which included karaoke and a basement dance party), and finally the goodbye party after our Sunday matinee. During Sunday's matinee there was a glitch with the sound that left me stranded on stage with the plant puppet and complete silence. It was the longest 10 seconds of my life, but we eventually got through it! 

Products Used: 


Amy Tangerine Goodness Thickers in White (no longer available, see similar here)


PB&J 6x6 Paper Pad by BasicGrey (no longer available)


Brown Micro Monogram Stickers by BasicGrey (no longer available)

Hey Boy! Alphabet Stickers by BasicGrey (no longer available)


Pebbles ABC Stickers in Kraft (no longer available)


Social Club Cardstock Stickers by Cosmo Cricket (no longer available)

Handmade Coffee Stickers from Target's Dollar Spot (no longer available, see similar here)

Friday, February 14, 2014

What I'm Drinking


I'd like to introduce you all to a little friend of mine. Meet the pomosa. Our friendship is still fairly new, having just met last December, but I knew at first sip that we would be besties.

I have long been acquainted with her cousin, the mimosa. And while it's true that mimosas rarely disappoint, there is just something about this pink, sparkling, tall glass of beautiful that has won me over, heart & soul.


Pomasas are super easy to make. They really only require two ingredients: pomegranate juice and proseco. But I like to add a few fresh pomegranate seeds to each glass, just to give it a little extra "wow." And if you're lazy like me, you can even buy Pom Wonderful Fresh Arils instead of dealing with a whole pomegranate (which, if I'm being honest, I find rather intimidating).


After you've added the seeds, just fill the glass about 1/3 of the way with pomegranate juice, then top off with proseco. See?! Couldn't be easier!


 Voila! Easy peasy. And oh, so good!


Disclaimer: If you've read my earlier post, then you know that I'm not actually drinking one of these delicious concoctions tonight. However, you may rest assured that I will be enjoying one (or more) tomorrow morning with my post-Valentine's Day brunch. I strongly suggest you do the same.